


Please note that if you are a skilled programmer I recommend you use classes instead of plain scripts for commands
All of the code mentioned here is at this GitHub repo:
To follow this tutorial you must have a basic understanding of:
- NodeJS v12+
- Discord.JS 12+
- Javascript
Creating the bot
If you haven't done so already, you will need to create a bot. If you don't know how, you can do this by:
- Going to the Discord developer dashboard and clicking "New Application"

- Giving it a name
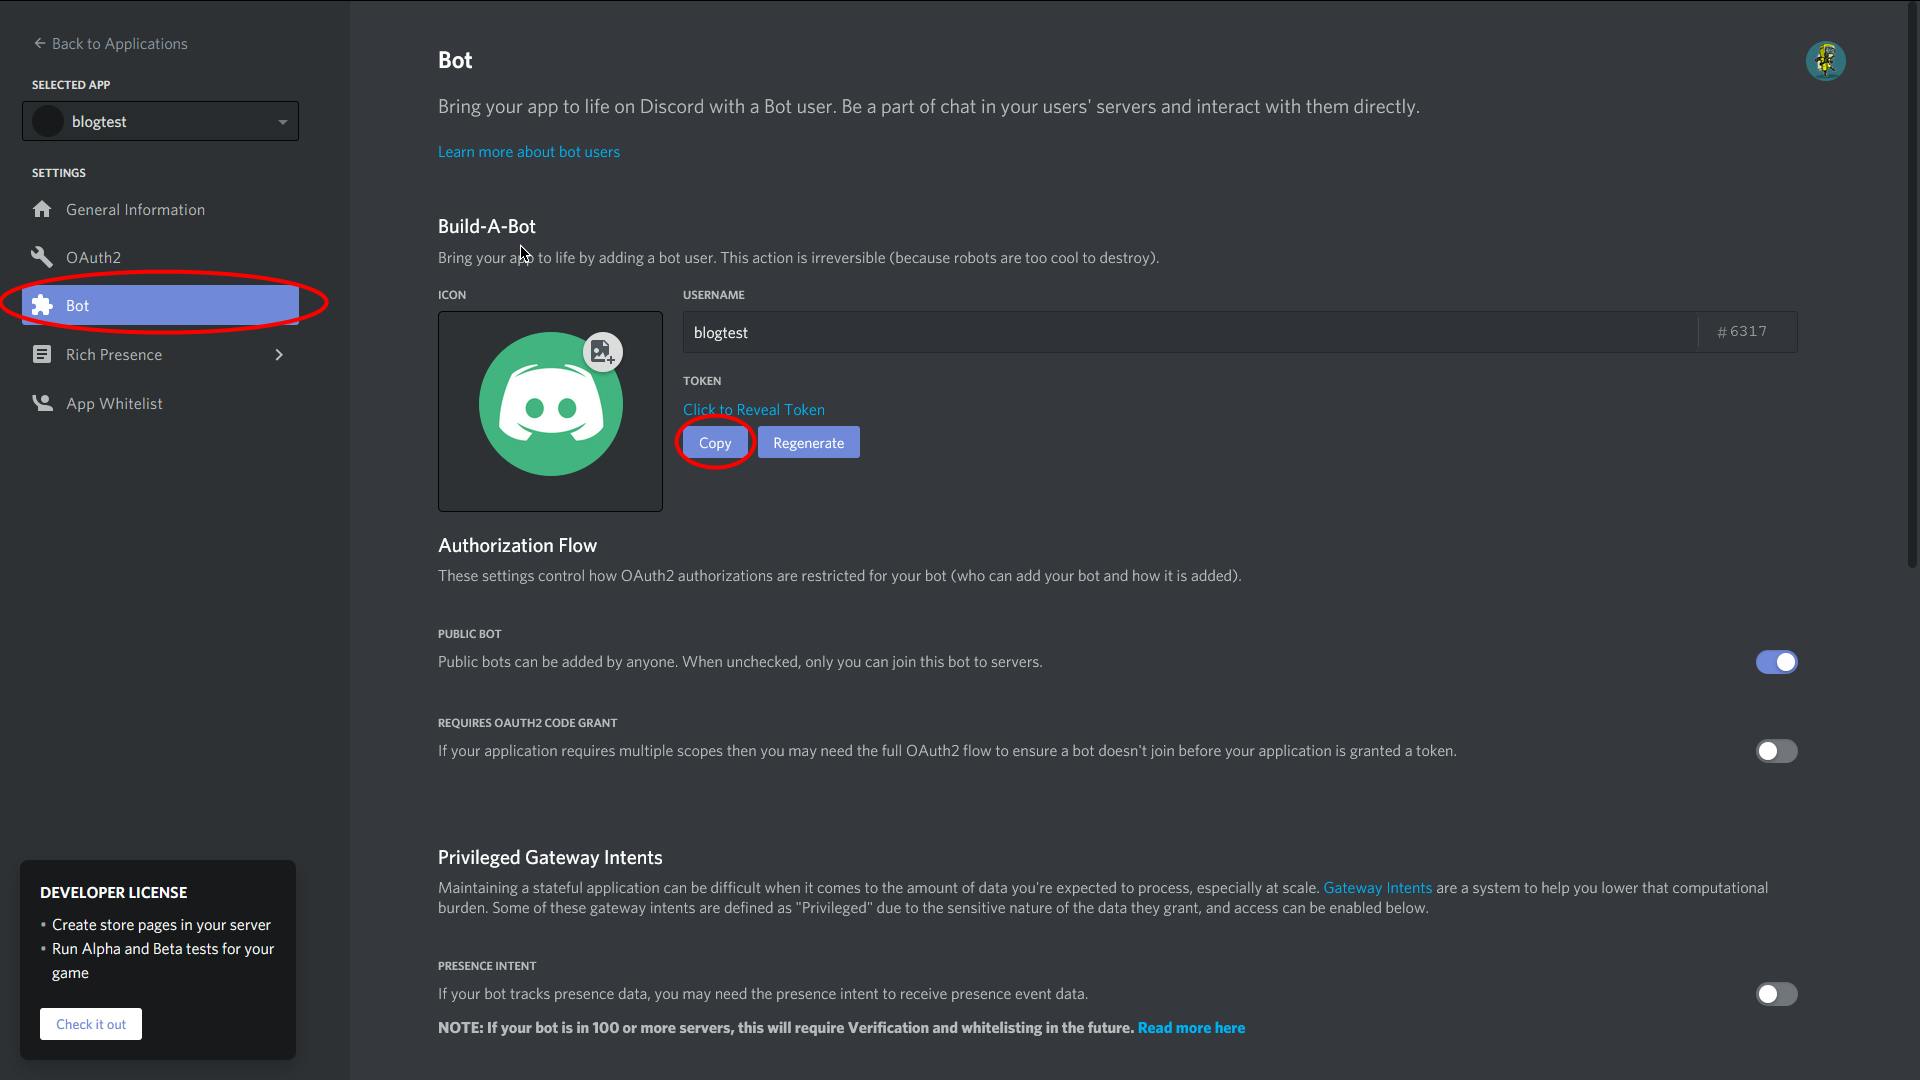
- Creating a bot application and saving the token for later
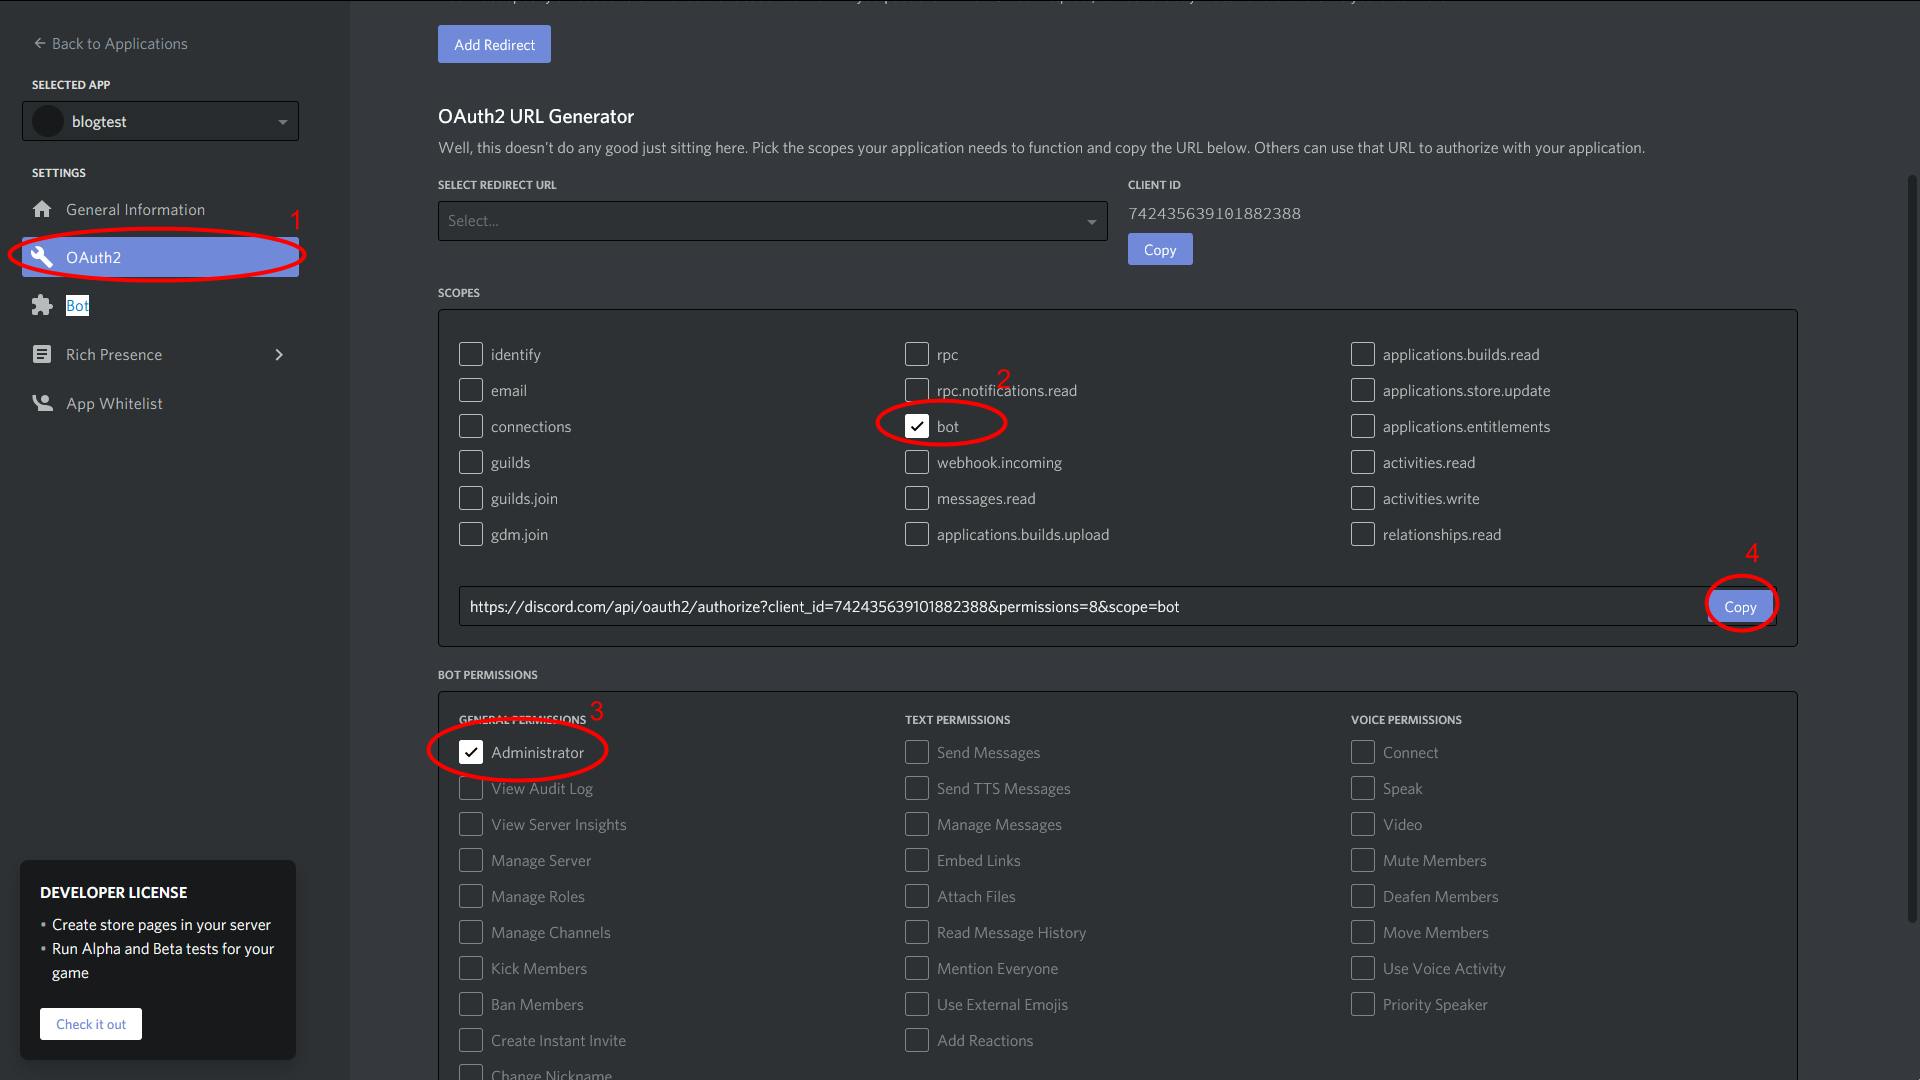
- Invite it to your server (paste the link into your browser)
Getting the bot online
Before we start creating the command handler we need to write some code to build on top of.
Before that though, we need to get our project ready. Create the following file tree:
- config.json
- src/
- bot.js
- commands/
- ping.js
Now run npm init or yarn init depending on which one you like to use. (Make sure you set your main file to src/bot.js!). Then run npm install discord.js or yarn add discord.js.
Confused? See all of the code at the GitHub repository i made for this post.
Now we need to write some code. Open up src/bot.js and write the following
const Discord = require('discord.js');

let bot = new Discord.Client();
This creates the bot.
Before we continue you will need to populate config.json.
{
  "token": "YOUR TOKEN HERE",
  "prefix": "!"
}
Make sure to replace YOUR TOKEN HERE with the token you grabbed from Discord earlier.
Go back to src/bot.js and add const config = require('../config.json') to the start of the file. Then at the end add
bot.login(config.token);
This is the most basic bot. Now we will move on to creating the command handler
Creating a command register
The best way to do this is to map all of your commands into a Map and then if a message starts with the prefix and there is a command in that map that has the same name as the command matched, run it.
It is good practice to separate this into multiple files.
First we need to map all of the commands on startup.
Add the following code to src/bot.js
const fs = require('fs');
const path = require('path');

let commands = new Map();

fs.readdirSync(path.join(__dirname, 'commands')).forEach((f) => {
    if(f.endsWith(".js")) {
        let file = require(path.join(__dirname, 'commands', f));
        commands.set(file.info.name, file);
        console.log(`Registered command: ${file.info.name}`);
    }
});
What this does is loop through all the files in src/commands and if they have the file extension .js then add that command to the map. You will understand why this works later.
Writing a command
Earlier you should have created the file src/commands/ping.js. Open it.
In this file, write
module.exports = {
    info: {
        name: "ping"
    },
    runner(msg, bot) {
        msg.channel.send("Pinging").then(sent => {
            sent.edit(sent.createdTimestamp - msg.createdTimestamp + "ms");
        });
    }
}
What this does is tell the command register that it's name is ping and when a user runs it, figure out the ping.
At this point if you start the bot (via node . on the command line) it will log to the console that it has registered a command called ping but you will not be able to run it on Discord.
Running commands
Maps make this very simple.
Go back to src/bot.js and write this code:
bot.on('message', (msg) => {
    if(!msg.author.bot && msg.content.startsWith(config.prefix)) { // checks if the sender isnt a bot and the message starts with the command prefix
        let command = msg.content.split(" ")[0].replace(config.prefix, "") //isolates the command name from the rest of the message. Does this by only getting the first word and removing the prefix.
        if(commands.has(command)) {
            let cmd = commands.get(command)
            if(typeof cmd.runner === "function") {
                cmd.runner(msg, bot);
            }
        }
    }
});
I have added comments to explain the more complicated lines. After those the bot just checks if that command exists and it has a runner then runs it if that is true.
Testing the bot
If you followed the tutorial correctly the bot should start and you should see the following in the console;

Now if you go to the server you invited the bot to and run !ping this should happen:
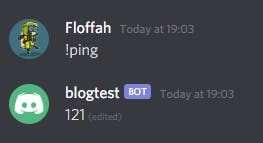
If it doesnt, make sure your code matches the github repository (minus the .idea directory my IDE made that automatically)
Thank you for reading!